Wednesday, June 27, 2012

Colston's 'Oh The Places You'll Go!' 1st Birthday Party

Hey y'all!

As promised, here is a more detailed look at my son's first birthday. The theme was Dr. Seuss's "Oh, The Places You'll Go!" and it was so much fun to work around. It was held at our local Lion's Club meeting space. 

Right as guests entered, I had a table set up. The first thing was a copy of "Oh, The Places You'll Go!" for the guests to sign. Next were copies of the cards I had made for Colston's time capsule project (post on that coming later) of his first year. Finally there were favors for all the kiddos.


The cards (as well as the invitations) were made by a super talented high school friend, Jenna. She has an Etsy shop called Oh Creative One. Stop by and see her; I guarantee if you don't see it, she can make it! James and I wrote the little poem for the cards, which reads:
"Please leave a note for Colston James
We've got something planned past today's fun and games
Into a time capsule we'll slip them to hide
Til he's 10 and 8 years they'll be locked up inside
On his 18th birthday to him we will show
All these great wishes for the places he'll go"


The responses on the cards were amazing. I didn't have the opportunity to read them until the day after the party, and man oh man...I cried! A few were funny but most of them were inspirational and sweet. The ones from his great-grandmothers were especially tear-jerkers. Don't even let me go any further, tears are welling just thinking of it!

I knew we would have a wide age range of kiddos, and tried to come up with inexpensive activities that didn't require continual adult supervision. Our Lion's Club is situated behind a residential street, in a huge field. It was awesome because there was no danger of any traffic, and the kids could roam around safely.

I had kid-sized footballs (from Dollar Tree) and one of those huge flying discs (from the $2.50 bin at Target). My father-in-law made the cornhole boards (more on that here), there was a water gun area, and then inside was a coloring station.
Before the party started my dad filled a huge plastic tub with water, and we filled up all the water guns too. That made things much easier on all the adults!
For the coloring station, I picked up 3 cheap coloring books at WalMart. I tore off the covers and pulled apart the pages. The crayons came from Dollar Tree, and so did the 3 little metal tubs I split them into.


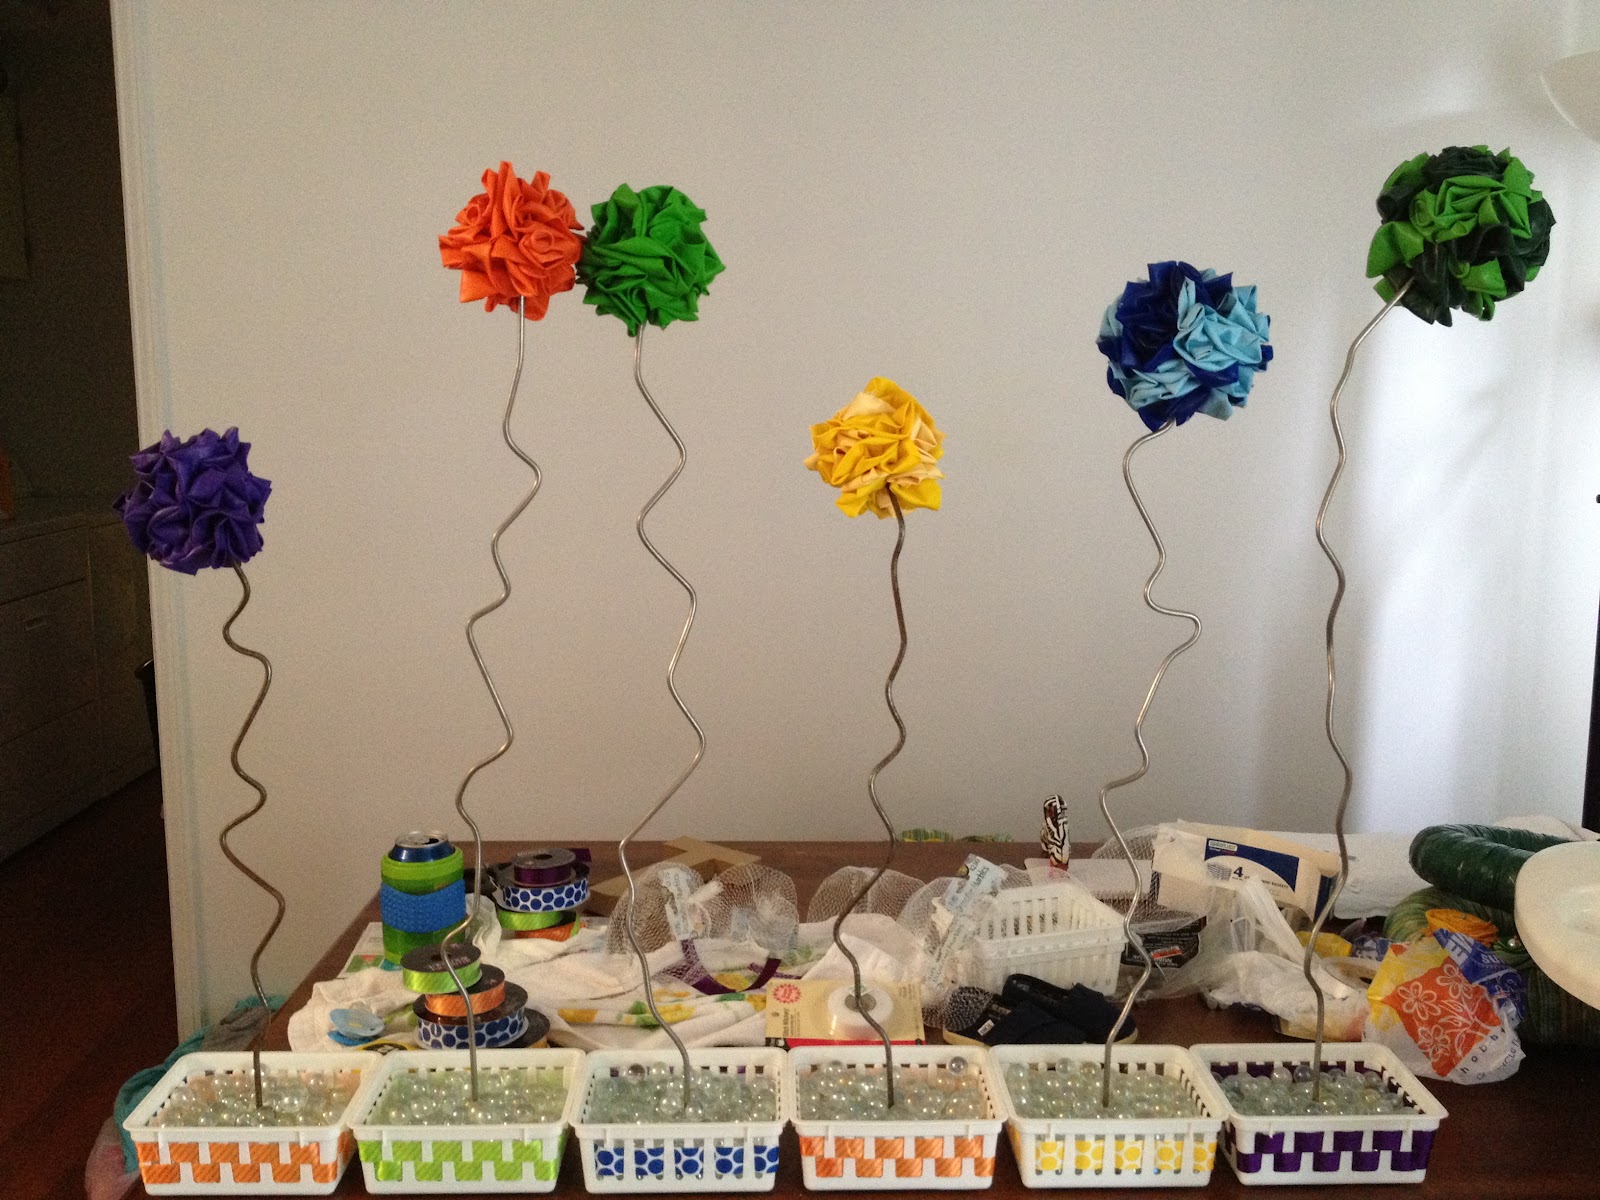
Most of the info on the decorations can be found in my first post, but here's a few shots of other things that weren't as labor intensive.
I picked up balloons the day of from our local 5 & Dime.
I hung huge paper poufs from the ceiling, which we purchased at a big box party store.
I also hung pictures of Colston, progressing through his first year, one each month. The guests seem to enjoy that, and it was cool to see how much he changed.
I simply printed 5x7's from WalMart and then ran them through my laminating machine.


For food, I wanted the prep to be simple. I didn't want to be worrying with cooking or warming things the day of.
I had chips & dip; pasta salad, fresh fruit, cheese cubes, and my BFF graciously picked up some chicken nugget trays from Chik-fil-A the day of (thanks, Jenn!).
We have this fabulous, decades-old place here called Tanner's Big Orange. They have food but they're known for their 'party punch'.
It. Is. Divine.
I got several gallons of that, in purple (to make the ice cubes) and green (to drink!).
I'm thirsty just thinking about it.


We couldn't have asked for better weather. Colston's birthday is the end of April, and weather here is famously iffy that time of year. On this particular day, it was sunny, breezy, and mid-70's. This same time 5 years ago, when I was married, it was pouring rain and the high was 50. So I was worried, but it turned out beautifully.

The mondo pinwheels came from Hobby Lobby. They were a last-minute find, but I adored them. So did Colston and all the other kids.


A gorgeous butterfly hung around for a while.


So, remember that water gun area I mentioned?
BAHAHAHA...
To say it was a hit would be a HUGE understatement.
Please observe...


The kids went wild! They chased down any adults who dared come near...including our photographer!
(luckily, she's a mom too, and was a good sport about it!)
At one point, James came inside and his back was soaked; he said it was an ambush!
Ha!


This picture cracks me up every time.
Those two girls are my BFFs. I have known them since we were barely walking and talking.
I mentioned on Facebook that this always makes me laugh; my "oh crap!" expression, Casie's smirk-y "uh-huh, see what you got yourself into by having kids" and Jenn's smug "uh-huh, and THAT is why I don't have any".


I was so darn excited about cake. I just *knew* Colston was going to LOVE it. I had all these images in my head of him smashing and squishing and icing flying. I even put a table cloth under his high chair in preparation for the mess.
The cake was just a small round cake from our local Publix. I told the nice bakery lady our theme and she did a great job.
But back to Colston and the cake. I knew it was going to be a hit. Every kid goes wild with their first cake, right?


WRONG.
He. Was. Pissed.
Now, in fairness it wasn't because of the cake. Everyone sang, and he looked a little concerned but at the end...they all clapped and cheered...and well, he lost it.
A lot.
  

Poor baby, he never did eat it. I do have a ton of pictures of him red-faced, teary and snotty though...oh well, what can you do, right?
It was a success in my book. Plus it will make for some funny memories as he gets older.


I really couldn't have asked for a better day. I had friends and family that came early (and from as far as TN; thanks Justin!), stayed late, helped us with decorating, setting up, cleaning up, you name it.
But best of all, they helped us celebrate our little man's first year!
(oh, and us surviving it...there's always that!)


All photos are courtesy of Yuli Smith.For these party ideas & more, visit my Pinterest board here.Heck, why not follow me while you're there? :)


Tuesday, June 26, 2012

Colston's 'Oh The Places You'll Go' 1st Birthday--The DIY Part

Hey y'all!

Today I'm going to share some pictures from Colston's first birthday. I started sketching and pinning ideas for his party as early as January--his birthday is in April. I was so super excited! I kept trying to come up with some fun, clever theme and it hit me--I LOVE Seuss! The vibrant colors, the funky creatures and awesome trees. And, being his first birthday, "Oh The Places You'll Go" seemed so fitting.

So the photos I'm sharing will include a link to the (p)inspiration (get it? hehe). I fully admit that these ideas were ALL inspired by things I found on Pinterest. I've linked back to the pins I drew my ideas from; some include tutorials, others were just photos. Enjoy!

High Chair Tray Ribbon
in progress...


....and in action!
{photo below courtesy of Yuli Smith}


#1 Photo Prop/Table Decor
in progress...


...and in action!
{photo below courtesy of Yuli Smith}


Balloon Topiary/Tree
in progress...


...and in action!
{photo below courtesy of Yuli Smith}


Cake Pop Tree!
{no pin for this, my dad created it!}
in progress...


...and in action!
{photo below courtesy of Yuli Smith}


Colston's party outfit!
{no pin here, either!}
Pants custom made by the fabulous


I purchased the iron-on letters at Hobby Lobby, and the bowtie was made from some scrap felt I had.
Shoes are baby TOMS. 


Balloon Topiary Seuss-ical Trees
{inspiration here, here, and here}
in progress...
(my dad welded the trunks all funky, and attached them to a square metal base; ribbon was woven through inexpensive baskets; clear marbles from the floral department were used to weigh them down)


...and in action!
{photos courtesy of Yuli Smith}


Corn Hole Boards!
{my father-in-law makes & sells regulation sized boards; I had him create a smaller set for the party, and used images from the book to illustrate them}
in progress...


...and *almost* ready for action! 


Come back later this week for a full post on the party!

Linking Up With:
Stephanie Lynn Under the Table and Dreaming
Tatertots & Jello
Weekend Warrior with Ask Anna
Homemaker on a Dime
Creations by Kara

Monday, June 25, 2012

How To Stain Concrete

Hey y'all!

It's the post you've all been waiting for...I hope ;)
No, seriously. This is a good one. Ever since I started blogging about our (then-future) small space move, I have touched on the idea of staining our concrete floors. I am super proud of this project, not only because it turned out fabulously, but it was cost-effective and I did it all myself (no hubs or daddy help!).

Before I get to the good stuff, I want to toss out a few disclaimers and FYIs.

--In researching this idea/project, I realized there are many types of concrete stain available, in a wide variety of colors. The brand I used was the same one my father-in-law used, made by Kemiko. The color I used is black.
--There are widely differing opinions as to how to apply the stain, how many coats, etc. I don't think there is a single correct way. In fact, I'm not sure you can mess this up...mostly because the end result depends about 90% on the chemical reaction between the stain and your concrete--not so much your technique or method of application.
--About that chemical reaction: I spoke to several different people, including a couple of 'pros' who told me that the age, location, current weather, and conditioning of the concrete ALL play a factor in the end result. I could stain my new floor the same time and way my neighbor stains theirs, and it look radically different. (lesson here: expect the unexpected)
--Color choice for me was easy. We did not want anything colored (green, blue, etc.) nor did I want anything that would run the risk of giving me a golden or orange hue. According to the pro at my local store, that meant black was the way to go. Something for y'all to consider if you do this :)
--This is for indoor AND outdoor concrete; the difference is the prep and the sealant you use.

*whew*

So here's an up close of my plain, new concrete. Per instruction, it's best to let newly poured indoor concrete cure for at least 4-6 weeks before applying stain.


Also, it needs to be as clean and free of debris as possible, and it helps if it's damp. Easy solution: with a clean, damp mop, go over the floor a few hours before you apply the stain. You want the floor damp, but without any standing water. This time window would vary, of course, on the weather. It was still cold enough here for the heat to be running so we didn't want it to get too dry. This helps the concrete not soak up quite so much stain at once. Think of it as priming wood before painting.


Another thing to note: this WILL get all over the place, and the Tyvek you see on the walls (my poor daddy, thinking it would salvage the walls) will not help. It will merely create a small white (or whatever wall color) stripe between the top splatters and the bottom ones. Do not paint beforehand, or plan to repaint/touch up after wards.


Once you have your stain, you need to get an inexpensive sprayer from your local home improvement store. Like the kind you use for weed killer. DO NOT get metal. Get one that has all plastic parts. The acid in the stain will corrode the metal. We got ours at Lowe's for about $10.


Here's one of those times about widely varying opinions. We mixed our stain roughly half and half; equal parts stain to water. HOWEVER. I have seen and heard some say that it should be 2:1 (water/stain) and some people say it can be 2:1 the other direction (stain/water). The only thing I know is that it's very similar to wood stain, in that the less diluted the stain is, the deeper your color has the potential to be. But that goes back to that pesky chemical reaction. I barely passed my honors Chem course. Don't ask me how it all works. Moving on.


Here's a little 'action shot' with me spraying. Plan to be in constant motion. There is no stand and spray for a few, move around. Just start in the farthest corner and work your way backward to your exit. Spray in sweeping motions, and don't spray enough that it begins to puddle up. (although I did on accident a couple of times, and it was fine)


This is right by the door after 1-2 coats. I ended up doing 3 coats total, and using every drop of my stain in the process. We weren't afraid of it turning out dark so I just went for it. Notice the contrast between this photo and the one above. The below picture shows the stain after it had dried, whereas in the top photo, it's still wet. 

Don't let the darkness fool you when it's wet; it can substantially lighten once it is dry. And speaking of dry--let each coat dry as close to 24 hours as possible before applying your next coat.


Here we are after all three coats have been applied, and the stain is drying. You can already see the marbled effect, which I love. This is caused by the consistency of the concrete and its' composition as much as it is the reaction to the stain. It's awesome!


After letting the stain cure for a day, I came back to apply the sealer. We talked to the stain pro as well as the helpful man at Lowe's, and they both recommended this. The man at Lowe's said the easiest and most effective method of application was using a long handled roller with a long nap roller cover (I think mine was 3/8 in.). I applied it much like you would paint to a wall. Poured it into a paint tray and started walking. It's important to note that if your concrete is stamped like mine, you need to push a bit more to ensure the sealer gets in all the grooves.


I used the entire gallon of sealer, which got me just over 2 coats. By that I mean, I did 2 full, thick coats and then used the remainder to ensure the edges were properly sealed and the grooves were covered. 

Here are two finished pictures, taken a few days ago. As you can see, it is not "black" at all. More of a brownish-gray. In fact, it really reminds me of concrete after a good steady rain...but marbled. We LOVE it. I have said multiple times if I could have this floor all over the house, I would.


Including the cost of having the concrete floor poured, we came out at less than $500. I was pretty thrilled. The end result is unique, and it's incredibly low maintenance. It's easy to vacuum, and a damp mop or Swiffer cleans it just fine. 

It also feels surprisingly good underfoot. It's not as cold or smooth as tile...however, it's still cool and has a little texture which I enjoy. Is that odd? I just like the way it feels under my feet. The room this is in ended up being our living room, which means it's high-traffic but cleaning is such a breeze.


I seriously cannot say enough positive things about this project. It was easy, it wasn't super expensive, it didn't take much time to complete (in terms of actual hands-on time), and it's low-maintenance. I think it would be awesome in a bathroom or kitchen as well.

I hope I covered everything well enough for you to try this out sometime. If y'all have any questions, post them in the comments below and I'll be sure to answer.


Linking up to:
Not Just a Housewife
Kathe With An E
Homemaker on a Dime
Boerman Ramblings
A Diamond in the Stuff
Momnivore's Dilemma

it's been awhile

Is life ever NOT chaotic? Are there people in this world who get up and work or parent (or work AND parent) and then magically at 5, work stops. Dinner at 6. Bed at 11. Does that happen to anyone, ever? Because if so, I need the secret! It ain't a happ-nin' in this house! (so to speak)

I figured there's not ever going to be a "good" time to blog, so I'm just going to play catch-up with y'all! I have several little things I've been wanting to share since we moved, namely the stained concrete! So, be on the look out for that in the next day or so!

Fingers crossed, I miss my blogging buds!